Many of my Orkut friends wanted to know how to install personal Orkut Themes. So I came up with a quick installing procedure for all my Orkut Friends. Here we go It's all for you people.
Below find the step by step instructions for installing Orkut Theme along with Screen shots, I hope I have made it easy and simple enough so that no so techie friends can understand and install the themes.
First step is to download the setup files for Firefox. Download Firefox here and save it on your desktop (or any other location where you can find it easily), After downloading it Double-click the Firefox Setup file.
The Mozilla Firefox Setup Wizard will open.
Click Next
Review and accept the License Agreement (shown here for Firefox 2), then click the Next button.
You will see the Setup Type dialog (shown here for Firefox 2) where you can choose between a Standard or Custom install.
Select Standard and click Next.
Standard installation
In the Setup Type dialog, the "Standard" option is selected by default.
Click the Next button to install Firefox with the recommended options. The Completing the Mozilla Firefox Setup Wizard dialog will then appear. Click the Finish button. If you leave the "Launch Mozilla Firefox now" box checked, Firefox will then start.
Custom installation
Select "Custom" in the Setup Type dialog (shown above) if you want to choose where to install Firefox and what shortcuts to create. In Firefox 2 and below, you will also have the choice to select some optional components.
Choose Optional Components - Firefox 2
You have the choice to select the options uncheck both of them and then click on next.
Choose Install Location
This option allows you to choose the "Destination Folder", where Firefox is installed.
The default is C:\Program Files\Mozilla Firefox\.

Set Up Shortcuts
You can choose create a Firefox shortcut icon on the Desktop, Firefox shortcut icons (for both a normal and a Safe Mode startup) in the Windows Start Menu Programs folder, and a Firefox shortcut in the Windows Quick Launch bar. These shortcuts are created by default in the Standard setup. Click the Next button to create these shortcuts.
Warning: If you choose not to create Firefox shortcut icons in the Windows Start Menu Programs folder, then the Mozilla Firefox (Safe Mode) shortcut will not be created.
Choose Start Menu Folder
The default Start Menu Programs folder for Firefox shortcuts is "Mozilla Firefox".
In Firefox 2, click the Install button, as shown above, to complete the installation.
In Firefox 3, click the Next button to continue with the installation.
Summary - Firefox 3
The Summary dialog will show you your installation choices. Click the Install button to complete the installation.
Completing the installation
After Firefox is installed, the Completing the Mozilla Firefox Setup Wizard dialog will appear (shown here for Firefox 2).
Click the Finish button.
If you leave the "Launch Mozilla Firefox now" box checked, Firefox will then start.
Note: When Firefox opens, you may receive a prompt asking if you would like to set Firefox as your default browsere, if another browser is currently the default. "Default browser" means the browser that opens when you click a link in your mail application or when you open an Internet shortcut or HTML document.
Second step is to download the setup files for Greasemonkey. Download Greasemonkey here and save it on your desktop (or any other location where you can find it easily), After downloading it Double-click the Greasemonkey Setup file.
Click on the Install Now button

When Firefox recognizes that you are installing an extension it brings up a box asking you if you want to install it. Click Install Now.
4. Restart Firefox to Finish Installation

The installation will not be complete until you restart Firefox. The good news is that Firefox will remember all the pages you are viewing right now, so go ahead and click on the Restart Now button.
Third Step is to install the images which you always wanted to be on your Orkut profile.
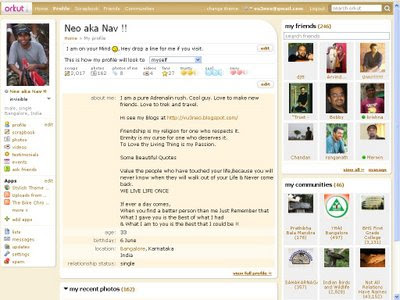
Open Firefox and login into your profile.
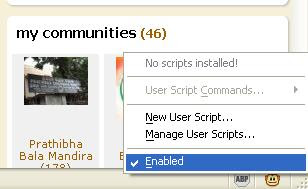
On the Right lower corner locate Greasemonkey right click and make sure Enabled is checked.
Your will see an Check mark on Enabled and on the top you will see No Scripts Installed!
login into your Orkut profile using Firefox and open Orkut Theme installer page.
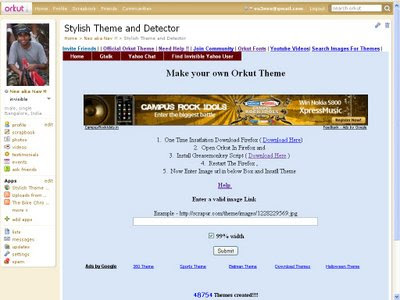
Enter the Image URL like Example - http://scrapur.com/theme/images/1228229569.jpg
in the white box and click submit button. When you click on submit button you will see the next screen which gives you option to install the Theme.
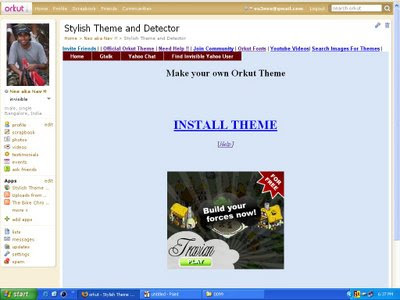
Click on INSTALL THEME link, next you should be able to see Greasemonkey installation window .
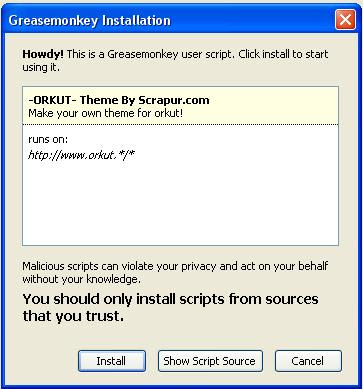
Then click Install, Your theme will be installed on your Orkut profile.
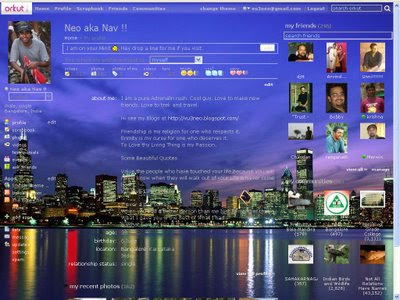
Click on home link on your Orkut profile, you will see your new Orkut Theme.
Things don’t always go the way you want them to. Leave a comment if you have any other further questions in the comments section I will reply to you.
Or Scrap me on Orkut.


